|
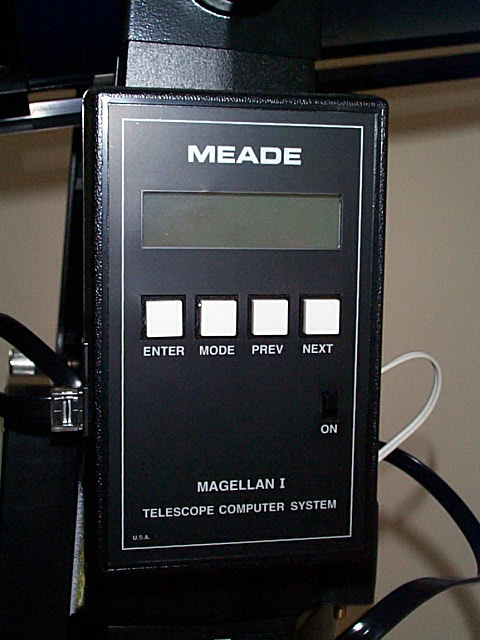
 The Magellan I Telescope
Computer System gives you the ability to locate astronomical objects much more quickly
and accurately than just using the standard setting circles on the LX10. The
Magellan I computer comes with two optical encoder wheels for attachment to the RA and DEC
axes of the LX10. These wheels subdivide each rotation of the RA or DEC axis into
4096 units (i.e. a unit is 0.09 degrees). As you move the LX10, the wheels inform
the Magellan how many units you have moved the Telescope in RA or DEC. This allows
the Magellan to work out where the LX10 is pointing provided it knew the where the LX10
was pointing when it was powered on. Telling the Magellan I where the LX10 is
pointing when it is powered on is fairly simple. The Magellan provides a list of
bright, well known stars for use in alignment. You pick a star from the list that is
currently visible, centre the star in the eyepiece of the LX10 and then tell the Magellan
that the star is centred. You repeat this for one more star on the list and the
Magellan is aligned. From now on the Magellan will always know where the LX10
is pointing. The Magellan I Telescope
Computer System gives you the ability to locate astronomical objects much more quickly
and accurately than just using the standard setting circles on the LX10. The
Magellan I computer comes with two optical encoder wheels for attachment to the RA and DEC
axes of the LX10. These wheels subdivide each rotation of the RA or DEC axis into
4096 units (i.e. a unit is 0.09 degrees). As you move the LX10, the wheels inform
the Magellan how many units you have moved the Telescope in RA or DEC. This allows
the Magellan to work out where the LX10 is pointing provided it knew the where the LX10
was pointing when it was powered on. Telling the Magellan I where the LX10 is
pointing when it is powered on is fairly simple. The Magellan provides a list of
bright, well known stars for use in alignment. You pick a star from the list that is
currently visible, centre the star in the eyepiece of the LX10 and then tell the Magellan
that the star is centred. You repeat this for one more star on the list and the
Magellan is aligned. From now on the Magellan will always know where the LX10
is pointing.
The Magellan has a database containing the positions of 12,218 celestial objects,
including the Messier list and the complete NGC catalogue. Once the Magellan is
aligned you can select an object from the database and the Magellan will show you how far
you need to move the telescope in order to reach the object. The accuracy of this
operation is highly dependent on a number of factors which are not fully explained in the
Magellan Manual. There is a discussion on the best alignment techniques below. I wasn't getting very good
results from my Magellan until I started using these techniques but am now getting very
accurate results and find the Magellan an indispensable piece of equipment when trying to
find faint objects for CCD imaging.
The Magellan has an RS232 port so that it can be connected to a PC. This allows
the position of your telescope to be plotted against the night sky by certain
astronomy software packages. You cannot buy the RS232 cable to connect the Magellan
to a PC and the manual that comes with the Magellan is not very clear on how to make
one. I have described how to build such a cable here.
I have successfully used the Earth
Centred Universe planetarium software with my Magellan. In my opinion this is an
excellent program at a very reasonable price.
The Magellan uses batteries very quickly when connected to a PC through the RS232 link.
The main problem with this is not the battery expense (you could use rechargable
batteries) it is the frustration of the Manegllan powering off in the middle of an
observing session causing you to have to replace the batteries and repeat the alignment.
I have avoided this by connecting my Magellan to an AC/DC convertor that supplies a
regulated 13V. It is important that the convertor is regulated otherwise you risk
damaging the Magellan. I made the cable that connects the Magellan to the power
supply simply by attaching some bell wire to a 9V battery connector. The battery connector
at the end of the bell wire is plugged into the 9V battery connector in the Magellan and
the other end of the bell wire is attached to the convertor (being careful to make sure
that the polarity is correct). I snipped the corner off the Magellan's 9V battery
cover so that that my power cord can come out of the unit when the battery cover is
in place. I could have left the battery cover off but I was concerned that the
Magellan's electronics would be exposed to moisture in the atmosphere.
Two Star Alignment
The following techniques were developed by Nigel Burge.
First, accurately level and polar align your telescope.
Then you should give careful consideration to the two alignment stars you will
use. The two alignment stars should be between 25 degrees and 75 degrees apart
(Nigel usually tries for 45 degrees apart) and as close to the celestial equator as
possible. The first alignment star should be where you intend to first observe since
accuracy will be best around this star. If the separation approaches 80 degrees,
accuracy suffers enormously. For example, Hamal and Castor are 82 degrees apart and
if these are used as alignment stars, the accuracy decreases as you approach the zenith
and can easily be 30 degrees out. On the other hand, if Hamal and Aldebaran are
chosen which are 37 degrees apart, accuracy is very good throughout the sky. Common
sense would indicate that a wide separation would be better so why is this not the case?
If the algorithm the Magellan uses is a cosine function, it would be inaccurate at a
separation of less than 25 degrees (which is what the handbook says) and would also be
inaccurate at a separation approaching 90 degrees (which would appear to be the case
here).
As long as you accurately centre on ANY alignment stars, Magellan will give you an
accuracy reading of about 100. This is purely a measure of how accurately you centred the
stars and polar aligned the telescope. It is NOT a reflection of the accuracy you
will get when using the Magellan to find objects. The Magellan can report an
alignment accuracy of 100% when the alignment stars are close to 90 degrees apart and yet
can be terribly inaccurate when it comes to finding an object.
Time Saving Tip: If you are performing a two star alignment
you do not need to set the DEC to 90 degrees as requested by the Magellan alignment
procedure. When the Magellan asks you to set the DEC to 90 degrees simply press
ENTER until you are requested to pick the first alignment star and then proceed with the
alignment procedure as normal.
Once you have performed the two star alignment, accuracy will be very good in the
region of the first alignment star chosen, to within ten degrees. Anywhere outside
that region and the accuracy will fall off. However it is easy to synch on any
bright star in the region in which you wish to observe to bring the accuracy back.
The Magellan manual only gives a few stars and implies that this is all that there
are. This is not the case. Magellan has the same star catalogue as the LX200
comprising 251 alignment stars and 100 double stars. You can download a copy of this
list, which shows star number, position, Bayer letter and proper name, by selecting the
format you require from the list below.
Before you begin a nights observation, make a list of the objects you want to find and
look up each one's brightest star neighbour in the above list to determine its Meade star
number. Now use the following procedure to find each object with a high degree
of accuracy:
-
Enter the Meade number of the object's brightest star neighbour into the Magellan.
-
Follow the Magellan's directions to locate the star.
-
Centre the star in the eyepiece.
-
Synch on the star by pressing and holding the ENTER key for a couple of seconds.
Then press ENTER again when it asks you to centre the star.
This procedure updates the position information in the Magellan so that it will be very
accurate in the region around the bright star. You can now use the Magellan to find
your object as normal. This technique invariably puts the object very near the
centre of the FOV of a 32mm eyepiece.
This is the alignment procedure that works best for me. After following Nigel's
advice on two star alignment I was still getting the occasional problem with alignment
accuaracy. I then found that the Magellan can be aligned very accurately and
repeatably just by doing a one star alignment. First you must accurately level and polar align your telescope. Then you perform the same Magellan
operations as for a two star alignment except when you are prompted to select the second
alignment star you press the MODE key. Alignment is then complete. So far, I have
chosen a number of different stars for one star alignment. They have been in the
South or West and near to the celestial equator. Doing a one star alignment seems to
avoid the hazards of the cosine arithmetic that the Magellan must use on two star
alignment. I still use Nigel's advice on syncing on bright stars near the object I
am trying to locate. That seems to work very well with the one star alignment
technique. So far one star alignment and synching has put the target object close to
the centre of the FOV of my 25mm eyepiece every time.
Unlike the two star alignment process you must correctly perform the operation of
setting the DEC of your OTA to 90 degrees. I believe the accuracy of this operaion
is important and is dependent on how accurately your DEC setting circle is
callibrated.
To check the callibration of
your DEC circle remove the fork mount from the equatorial wedge and place the drive
base on a flat surface such as a table top. Make sure the OTA is pointing straight
up when you do this so that the assembly doesn't topple over. Check that the drive
base is level using a spirit level. If necessary place shims under the drive base
to get it level. Now, move the OTA until the sides of the OTA are truly
vertical. Again, use the spirit level to check this. Now you have a vertical
OTA and a level drive base, so the OTA must be at 90 degrees to the base! At this
point you should lock the DEC axis. Check you DEC circle. If it does not read
exactly 90 degrees then you need to adjust it. To do this, slightly undo the Meade
logo knob that holds the circle in place. You should now be able to rotate the
circle until it reads exactly 90 degrees. Once it is reading exactly 90 degrees
tighten the knob.
|